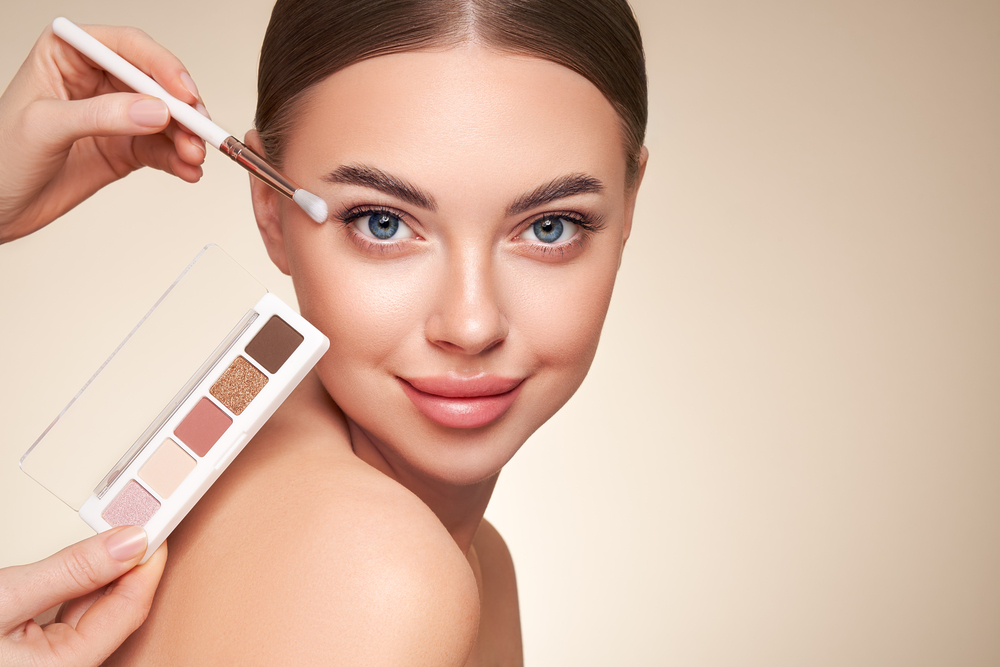
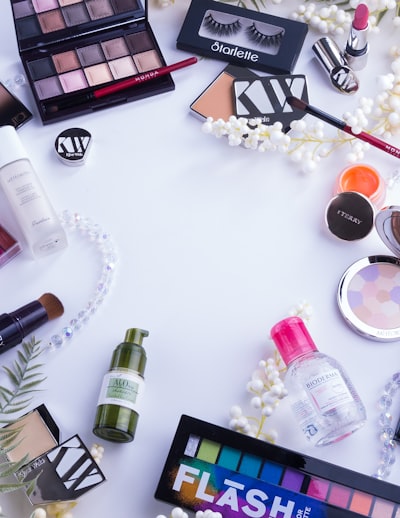
Makeup has always been important for enhancing beauty and expressing oneself. From bold and dramatic styles to subtle and natural looks, makeup lets us show off our personality and creativity. Whether you’re just starting out or have been doing makeup for years, it’s crucial to know about the different types of makeup in order to achieve the look you want.
In this guide, we’ll cover:
- A detailed explanation of the various makeup categories.
- The specific uses of each product.
- Helpful tips for choosing and applying makeup effectively.
Are you ready to start this beauty journey? Let’s explore the amazing world of makeup together! 🌟
1. Foundation
Definition and Purpose
When it comes to the different types of makeup, foundation is the cornerstone of any makeup routine, designed to create an even skin tone by covering imperfections and providing a uniform base. It’s the first step in achieving a flawless complexion, setting the stage for other products like blush, bronzer, and highlighter.
Different Forms of Foundation
- Liquid: This is the most versatile form, offering buildable coverage from sheer to full. It suits most skin types and is available in various finishes like matte, dewy, or satin.
- Powder: Ideal for oily skin, powder foundation provides a matte finish and helps control shine. It’s also great for touch-ups throughout the day.
- Cream: These foundations are rich and hydrating, perfect for dry or mature skin. They offer medium to full coverage with a natural finish.
- Stick: Convenient and portable, stick foundations are excellent for on-the-go touch-ups. They provide medium to full coverage with a creamy texture that blends easily.
- Mousse: Lightweight and airy, mousse foundations offer a soft-focus effect with sheer to medium coverage. Great for those who prefer a natural look.
Tips on Selecting the Right Foundation
Choosing the right foundation can feel overwhelming, but it doesn’t have to be:
- Skin Type:
- Oily: Go for oil-free or matte formulas like powder or oil-control liquid foundations.
- Dry: Cream or hydrating liquid foundations work best.
- Combination: A balanced formula like mousse or a satin-finish liquid foundation is ideal.
- Desired Coverage:
- Sheer: Opt for lightweight liquids or mousses.
- Medium: Choose buildable liquids or creams.
- Full: Stick with full-coverage liquids or cream-to-powder formulas.
Types of Makeup: Application Techniques
Achieving a flawless finish involves proper application techniques:
- Prep Your Skin: Always start with clean, moisturized skin. Use a primer suited to your skin type for extra longevity.
- Tools Matter:
- Brushes: Use flat brushes for full coverage and buffing brushes for a more natural look.
- Sponges: Beauty blenders are excellent for blending liquid foundations seamlessly.
- Fingers: Ideal for cream foundations; the warmth of your fingers helps blend the product into your skin. This article discusses the pros and cons of each method.
- Blend Well: Start from the center of your face and blend outwards. Don’t forget to blend along your jawline and hairline to avoid harsh lines.
By choosing the right foundation type tailored to your skin needs and perfecting your application technique as outlined in these expert tips, you’ll be well on your way to achieving that coveted flawless base!
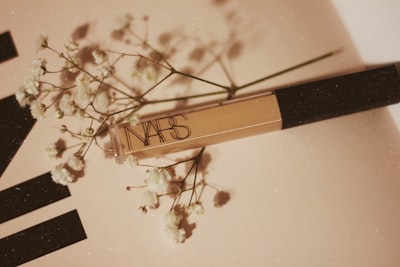
2. Concealer
The Role of Concealer
Concealer is your secret weapon for covering imperfections and brightening the under-eye area. Whether you’ve got a pesky pimple, dark circles, or redness around your nose, concealer can help give your skin that flawless finish.
Types of Makeup: Concealers
There are several types of concealers to choose from based on your needs:
- Liquid Concealer: Ideal for normal, oily, or combination skin. It offers buildable coverage and works well for both under-eye darkness and blemishes.
- Cream Concealer: Best for dry or mature skin. Creamy formulas provide excellent coverage but need to be set with powder to prevent creasing.
- Stick Concealer: Convenient for on-the-go touch-ups. Stick concealers offer full coverage and are great for spot-concealing.
- Color Correctors: These are specialized concealers:
- Green: Neutralizes redness from acne or rosacea.
- Peach/Orange: Counteracts dark circles, especially on deeper skin tones.
Application Techniques
Achieving effective coverage without looking cakey can feel like a fine art. Here’s how:
- Prep Your Skin: Start with a clean, moisturized face. This helps the concealer blend smoothly.
- Choose the Right Shade: For under-eyes, pick a shade slightly lighter than your foundation to brighten the area. For blemishes, match your skin tone exactly. If you’re struggling to find the perfect match, consider reading this helpful guide on selecting the right concealer shade.
- Apply Sparingly: Dot the concealer onto the problem area using a brush or your fingertips.
- Blend Well: Use a damp beauty sponge or a small brush to blend the edges seamlessly into your foundation.
- Set with Powder: Lightly dust translucent powder over the concealed areas to lock it in place and prevent creasing.
Remember, less is more when it comes to concealer application—building up thin layers will look more natural than caking on too much product at once.
Experiment with these tips and find what works best for you!
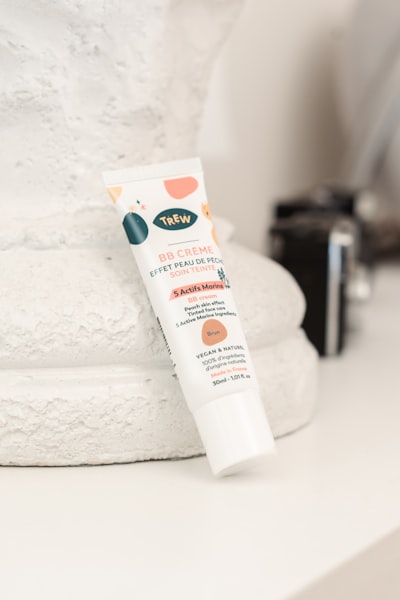
3. BB Cream and CC Cream
When people first beginning learning about the different types of makeup one of the first things they stumble upon is foundation vs. BB cream vs. CC cream. Learning the difference between these 3 products can help you decide which is the best for your skin type and the look you want to create.
What is BB Cream?
BB cream, short for Beauty Balm or Blemish Balm, is like the Swiss Army knife of makeup products. It offers a blend of skincare benefits along with light coverage, making it perfect for those “no-makeup” makeup days.
Skincare Benefits
Many BB creams are loaded with beneficial ingredients like antioxidants, SPF, and hydration boosters. Think of it as a moisturizer, sunscreen, and foundation all rolled into one.
Light Coverage
Provides just enough coverage to even out your skin tone while still allowing your natural beauty to shine through.
What is CC Cream?
CC cream—short for Color Correcting or Complexion Corrector—takes it a step further by addressing specific skin tone issues.
Color Correction
CC creams often contain color-correcting pigments that counteract redness, dullness, or sallowness in the skin.
Higher Coverage
Generally provides slightly more coverage than BB cream but still lighter than traditional foundation.
When to Use BB/CC Creams vs. Traditional Foundations
BB and CC creams are versatile but knowing when to use them can make all the difference.
- Daily Wear: Ideal for everyday use when you want minimal fuss but still need some coverage and skincare benefits.
- Quick Application: Perfect for those busy mornings when you don’t have time for a full face of makeup.
- Skin Concerns: If you have specific skin tone issues like redness or dullness, CC cream can be your go-to product.
In contrast, traditional foundations are better suited for:
- Full Glam Looks: When you need long-lasting, full coverage for special occasions.
- Customizable Finish: Offers more options in terms of finish (matte, dewy) and coverage levels (sheer to full).
4. Blush (Rouge)
Blush, also known as rouge, is your secret weapon for adding a healthy, vibrant flush to your cheeks. It’s like magic in a compact or tube that instantly brightens your face and gives you a youthful glow.
Types of Makeup Blush: Powder, Cream, and Liquid Stains
Blush comes in various forms, each with its own unique application and finish. Here are the main types:
- Powder Blush: Perfect for oily skin types and those who prefer a matte finish. It’s easy to apply with a brush and blend seamlessly into your foundation.
- Cream Blush: Ideal for dry or mature skin, cream blushes provide a dewy finish and blend beautifully with fingers or a sponge.
- Liquid Stains: These are great for long-lasting color that looks natural. They can be applied directly with fingers or a brush and are perfect for achieving that “just-pinched” look.
Choosing the Right Blush Shade
Selecting the right blush shade can make all the difference in achieving a natural look. Here’s a quick guide based on skin tone:
- Cool-Toned Skin: Look for blush shades with blue or pink undertones. Colors like soft pinks, berry shades, and cool mauves work well.
- Warm-Toned Skin: Opt for blushes with peachy, coral, or bronze undertones. Warm peach, apricot, and rich terracotta shades will enhance your complexion beautifully.
Applying Blush for a Natural Look
To get that perfect flush without looking overdone:
- Smile to find the apples of your cheeks.
- For powder blush, use a fluffy brush to lightly dust the blush onto the apples of your cheeks and blend upwards towards your temples.
- For cream blush, use your fingers or a makeup sponge to dab it onto the apples of your cheeks and blend outwards in circular motions.
- Liquid stains should be applied sparingly—dot small amounts onto your cheeks and blend quickly before it sets.
Experimenting with different types of blush can be really fun! Find what works best for you and enjoy that beautiful pop of color on your cheeks.
5. Bronzer
Adding bronzer to your makeup routine can make a big difference. It warms up the complexion and adds dimension, making your skin look sun-kissed and radiant.
Types of Makeup: Bronzers
Bronzers come in various formulations, each serving different purposes:
- Powder Bronzers: Ideal for an all-over warmth. They’re easy to blend and perfect for beginners.
- Cream Bronzers: Best for targeted contouring. They offer a more natural finish and are great for dry skin.
- Liquid Bronzers: These are versatile and can be mixed with foundation or used alone for a dewy glow.
- Stick Bronzers: Portable and easy to apply, making them perfect for on-the-go touch-ups.
Choosing the Right Bronzer
Picking the right bronzer depends on your skin tone and type:
- Fair Skin: Opt for light, peachy bronzers.
- Medium Skin: Go for golden or honey-toned shades.
- Dark Skin: Rich mocha or deep bronze shades work best.
For oily skin, powder bronzers are ideal, while cream or liquid formulations suit dry skin better.
Application Techniques
To achieve that gorgeous sun-kissed glow without looking muddy:
- Prep Your Skin: Start with a clean, moisturized face. Apply foundation and concealer as usual.
- Choose Your Brush: Use a fluffy brush for powder bronzers or a stippling brush for creams.
- Apply Strategically: Focus on areas where the sun naturally hits—your forehead, cheekbones, nose, and jawline.
- Blend Well: Blending is key! Make sure there are no harsh lines.
- Less is More: Build up the color gradually to avoid overdoing it.
Experiment with different types of makeup and techniques to find what works best for you. Whether you’re going for subtle warmth or dramatic contouring, mastering bronzer application will elevate your makeup game!
6. Highlighter
Creating a luminous complexion can make your skin glow and give you that sought-after dewy look. This is where highlighters come into play!
Types of Makeup: Highlighters
Highlighters come in different formulas, each offering unique benefits:
- Powder Highlighters: These are great for those with oily skin as they help control shine. Powder highlighters are often pressed or baked and can be applied with a brush for precise placement.
- Liquid/Cream Highlighters: Ideal for dry or combination skin types, these formulas provide a more natural, dewy finish. They can be blended with your fingers, a sponge, or a brush.
Placement Techniques
Knowing where to place your highlighter can make all the difference!
Cheekbones
Adding highlighter to the tops of your cheekbones can accentuate them and give you that beautiful, sculpted look. Use a fan brush or your fingers to apply it.
Brow Bone
Highlighting just below your eyebrows can instantly lift your eyes and make them pop. Use a small brush for precision.
Other Key Areas
- Cupid’s Bow: Highlighting the area above the center of your top lip can make your lips appear fuller.
- Nose: A touch of highlighter down the bridge of your nose can create the illusion of a slimmer nose.
- Inner Corners of Eyes: This technique brightens up your eyes, making you look more awake.
Experiment with different types of highlighters and placement techniques to find what works best for you. Whether you prefer a subtle glow or full-on glam, there’s a highlighter out there for every style!
7. Eye Makeup Products
Here we discuss eyeliner, mascara and eyebrows. Eyeshadow is also essential!! Read our eyeshadow guide here for more info.
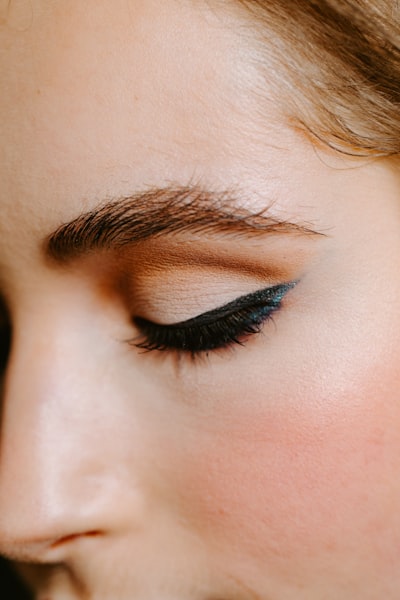
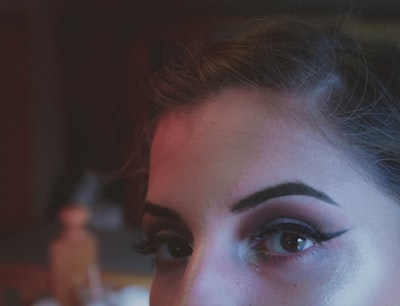
A. Eyeliner
As far as the different types of makeup, eyeliner is the number one game-changer when it comes to defining and accentuating your eyes. It can transform your look from simple to dramatic in just a few strokes.
Different Forms of Eyeliner
- Pencil Eyeliner: Perfect for beginners, pencil eyeliners are easy to control and come in various shades. Some pencils are kohl-based, which glide on smoothly, while others are wax-based for a longer-lasting effect.
- Gel/Cream Eyeliner: These provide intense color payoff and are often used with an angled brush for precise application. Gel liners are great for creating bold looks.
- Liquid Eyeliner: Ideal for sharp, defined lines, liquid eyeliners usually come with a brush or felt-tip applicator. They offer the most precision, making them perfect for winged eyeliner.
- Waterproof Options: Available in all forms (pencil, gel, liquid), waterproof eyeliners ensure your look stays put through sweat, tears, or rain.
- Felt-Tip Pens: These combine the ease of a pencil with the precision of a liquid liner. Felt-tip pens are great for achieving both thin lines and dramatic wings.

Choosing the Right Eyeliner Based on Eye Shape
Your eye shape can influence which eyeliner technique will work best for you:
- Small Eyes: Tightlining (lining the waterline) can make your lashes look fuller without taking up lid space.
- Almond Eyes: Almost any eyeliner style suits almond-shaped eyes. Experiment with different looks to see what you love most.
- Hooded Eyes: A thin line close to the lash line works wonders. For winged looks, keep the wing smaller and flick it upward.
- Round Eyes: Elongate round eyes by applying eyeliner thicker at the outer corners and tapering inward.
Techniques for Applying Eyeliner Effectively
Mastering eyeliner application takes practice but these tips can help you get started:
- Steady Your Hand: Rest your elbow on a flat surface to stabilize your hand.
- Start Small: Begin with small dashes along your lash line and connect them for a smooth line.
- Angle Matters: Hold the applicator at an angle rather than perpendicular to your face.
- Layering Technique: For more intense color, layer your liner instead of applying heavy pressure in one go.
- Smudge-Proof Tricks:
- Set pencil or gel liners with a matching eyeshadow to prevent smudging.
- Use waterproof formulas if you have oily eyelids or plan to wear makeup all day.
Eyeliner not only defines but also opens up endless possibilities for creativity. Whether you’re aiming for a subtle enhancement or an eye-catching statement, the right product and technique can elevate your makeup game.
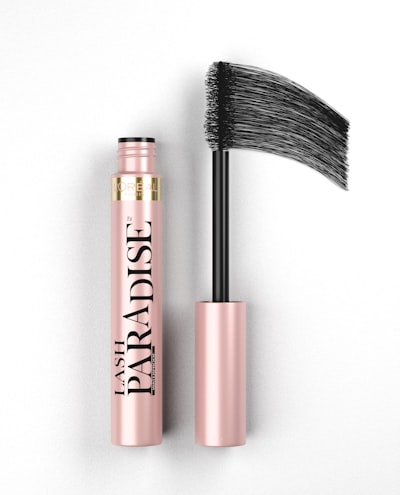
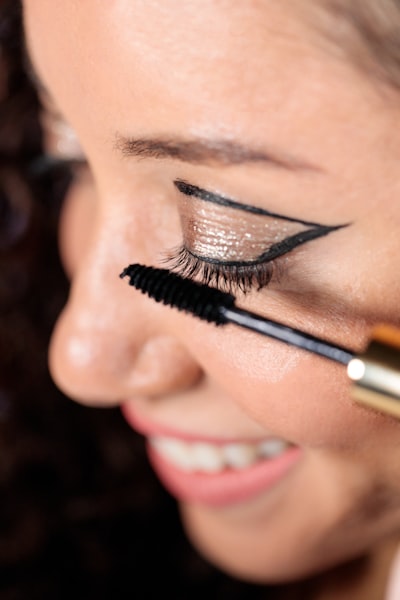
B. Mascara
Mascara is a game-changer when it comes to enhancing your eyes by adding volume, length, and definition to each lash strand. No other types of makeup compare to the look mascara gives your eyes. Whether you’re going for a natural look or a dramatic effect, the right mascara can make all the difference.
Types of Mascara Formulas
Choosing the right mascara depends on what you want to achieve:
- Volumizing Mascara: Perfect for giving your lashes that full, thick look. Brands like Maybelline’s Lash Sensational are known for their unique brushes that separate lashes beautifully while adding volume.
- Lengthening Mascara: Ideal if you want longer, more defined lashes. Try out mascaras like L’Oréal’s Telescopic Mascara to extend your lash length dramatically.
- Waterproof Mascara: Great for long-lasting wear, especially in humid conditions or emotional moments (hello, weddings!). CoverGirl’s LashBlast Volume Waterproof Mascara is a popular choice.
- Curling Mascara: Designed to help hold the curl of your lashes with special formulas and curved brushes. A fan favorite is Benefit’s Roller Lash.
Application Tips
Getting that perfect lash look involves some simple but effective techniques:
- Wiggle from Root-to-Tip: Start at the base of your lashes and wiggle the wand upwards to coat each lash evenly. This helps in adding volume and separating the lashes.
- Double-Side Coating: Don’t forget to coat both sides of your lashes. This ensures that every lash is covered and looks fuller.
- Use a Clean Spoolie Brush: If you notice clumps, take a clean spoolie brush and gently comb through your lashes to separate them.
- Layer It On: For more impact, apply multiple coats but make sure each layer dries before applying the next one.
- Bottom Lashes Too!: Lightly coat your bottom lashes for a balanced look.
Playing around with different types of mascara can be really fun and can help you discover what works best for your eyes. Experiment with various formulas and application techniques to find your signature lash look!
C. Eyebrow Products
Today some of the most trendy products when it comes to the different types of makeup are made for your eyebrows. Why is that? Well-defined eyebrows are like the perfect frame for a beautiful picture—they really pull everything together! Here’s a quick guide to getting those brows on fleek.
Importance of Well-Defined Eyebrows
Eyebrows have a huge impact on your overall look. They frame your face and can make your eyes pop, giving you that polished finish even with minimal makeup.
Types of Makeup: Eyebrow Products
- Eyebrow Pencils: Great for precision. Fine-tipped pencils, like Anastasia Beverly Hills Brow Wiz, mimic natural hair strokes.
- Tinted Gels: Offer both hold and subtle color enhancement. Benefit’s Gimme Brow+ is a popular choice and comes in multiple shades.
- Powders: Perfect for filling in sparse areas. They provide a softer, more natural look.
- Pomades: These give a bolder brow and are excellent for defining and shaping. Check out the NYX Tame & Frame Brow Pomade.
Techniques for Natural-Looking Brows
- Choose the Right Shade: Match your brow product to your hair color or go one shade lighter for a more natural look.
- Use Short Upward Strokes: When filling in sparse areas, use short, upward strokes to mimic natural hair growth.
- Blend, Blend, Blend: Use a spoolie brush to blend the product into your brows for an effortless finish.
- Highlight Your Brow Bone: Apply a light eyeshadow or highlighter under the arch of your brow to lift and define.

Experiment with different products and techniques to find what works best for you. Whether you’re going for bold brows or something more natural, well-groomed eyebrows will always add that extra touch of glam to your makeup routine.
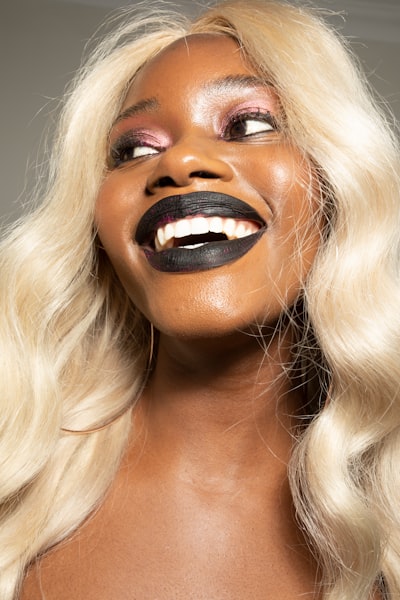
8. Lip Makeup Products
Lip products are essential in any makeup routine, adding the perfect finishing touch to your look. There are so many types to choose from, and each has its own unique benefits. Let’s dive into some of the most popular lip products and how to use them!
A. Lip Gloss & Lip Balm
Lip Gloss
Lip gloss is all about that shiny, reflective finish that makes your lips pop. It’s perfect for when you want a little extra glam or a fresh, youthful look.
Benefits:
- Provides high shine
- Can give the illusion of fuller lips
- Comes in various tints and finishes (sheer, glittery, opaque)
Tips for Use:
- Solo Shine: Apply lip gloss directly on bare lips for a quick and easy shine.
- Over Lipstick: Layer over your favorite lipstick to add dimension and glossiness.
- Targeted Application: Concentrate the gloss in the center of your lips to make them appear fuller.
Lip Balm
Lip balm is your go-to for hydration and nourishment. It’s especially great for keeping your lips moisturized during colder months or whenever they feel dry.
Benefits:
- Deeply nourishes and hydrates lips
- Often contains beneficial ingredients like beeswax, shea butter, or vitamin E
- Can be clear or slightly tinted
Tips for Use:
- Daily Hydration: Apply throughout the day whenever your lips feel dry.
- Under Lip Color: Use as a base before applying other lip products to keep your lips smooth.
- Night Treatment: Apply a thick layer before bed to wake up with soft, supple lips.
Combining Lip Gloss & Lip Balm
Layering these two can give you the best of both worlds—hydrated, glossy lips without compromising either effect.
How-To:
- Apply Balm First: Start with a layer of lip balm and let it absorb fully into your lips.
- Add Gloss: Once the balm has set, follow up with your favorite lip gloss for that high-shine finish.
B. Lipstick
Lipstick is a classic staple in any makeup collection. From bold reds to everyday nudes, there’s a shade and finish for every occasion.
Types of Lipstick:
- Matte: No shine, long-lasting, highly pigmented.
- Cream: Smooth application with a slight sheen.
- Satin: A mix between matte and cream; offers color without being too shiny.
- Liquid: Applies like a gloss but dries down to a matte finish.
Choosing the Right Shade:
- For fair skin tones, try pinks, corals, or nude shades.
- Medium skin tones look great in berry shades, mauves, and rose colors.
- Dark skin tones can rock deep reds, plums, and browns.
Application Tips:
- Prep Lips: Exfoliate to remove dead skin cells for a smooth application.
- Line Lips: Use a matching lip liner to define the shape and prevent feathering.
- Apply Color: Swipe on directly from the tube or use a brush for precision.
- Blot & Set: Blot with tissue paper and apply another layer for longer wear.
C. Lip Liner
Lip liner helps define the shape of your lips and can also be used as a base to prolong lipstick wear.
Benefits:
- Defines lip shape
- Prevents lipstick from bleeding or feathering
- Can be used alone for a matte look
Tips for Use:
- Outline Lips: Carefully trace along the natural edge of your lips.
- Fill In: For longer-lasting color, fill in your entire lip area with liner before applying lipstick.
- Blend Edges: Soften harsh lines by blending with a brush or finger.
D. Lip Stain & Tint
Lip stains and tints offer long-lasting color that looks natural and is perfect for minimal makeup days.
Benefits:
- Long-lasting wear
- Natural-looking flush of color
- Usually lightweight and non-sticky
Application Tips:
- Apply Sparingly: A little goes a long way—dab onto lips and blend outwards.
- Build Color: Layer more product if you want deeper pigmentation.
- Top With Balm/Gloss: Add some hydration if needed without losing the stained effect.
By exploring these different types of lip makeup products—from glosses to balms—you can easily find what works best for you! Play around with combinations until you find your perfect lip look!
B. Lip Liner & Lip Primer
Lip Liners are essential for defining the borders of your lips. They prevent feathering, especially when you’re rocking brighter shades that tend to migrate outside the lines while eating or drinking.
Application Tips:
- Always follow your natural lip shape closely.
- Avoid over-exaggeration to prevent an unnatural appearance.
- Start from the Cupid’s bow and outline towards the corners.
Lip Primer acts as a base for your lipstick, ensuring it stays put and looks vibrant throughout the day. It smooths out any fine lines and creates an even surface for easy application.
Why Use Lip Primer?
- Enhances the longevity of your lipstick.
- Prevents color from settling into fine lines.
- Provides a smooth canvas for a flawless finish.
Using both products together can make a significant difference in how your lipstick looks and lasts. For instance, applying a primer before lining and filling in with lip liner can create a perfect base for your favorite matte or creamy lipstick. This combination is particularly beneficial when considering what combo of under-the-lipstick-and-over-the-lipstick products help lipstick last longer.
When choosing lipstick types, consider:
- Matte finishes: Known for their longevity but can be drying, which is something to keep in mind according to this guide on choosing between matte and glossy lipsticks.
- Creamy textures: Offer comfortable wear with slight shine.
Selecting shades based on skin tone undertones:
- Cool undertones: Look great with blue-based reds or soft pinks.
- Warm undertones: Rock orangey reds or peachy nudes.
Remember, bold reds are better suited for evening events, while soft pinks work well during daytime activities.
For mature women looking to enhance their lipstick application, these tips can be particularly helpful. Additionally, if you’re over 50, exploring the best lipsticks suited for this age group might be worthwhile.
9. Setting Products
Setting products are the unsung heroes of the makeup world, ensuring your masterpiece stays put throughout the day. Whether you’re aiming for a matte finish to combat oily skin or a dewy glow to keep things radiant, setting sprays and powders have got you covered.
Types of Makeup: Setting Sprays
Setting sprays come in various formulations tailored to different needs:
- Matte Finish Sprays: Perfect for those with oily skin, these sprays help control shine and keep your makeup looking fresh.
- Dewy Finish Sprays: Ideal for dry or combination skin, they add a touch of hydration and give a radiant, glowing look.
Pro Tip: Hold the spray about 8-10 inches from your face and mist in an “X” or “T” shape for even coverage.
Types of Makeup: Setting Powders
Setting powders offer a different texture and feel compared to sprays:
- Translucent Powders: These are great for setting makeup without adding any extra color, making them versatile for all skin tones.
- Tinted Powders: These can offer additional coverage and help even out skin tone while setting your foundation.
Pro Tip: Use a fluffy brush to apply powder lightly on areas prone to oiliness like the T-zone.
Types of Makeup: Choosing Between Sprays and Powders
When deciding between a setting spray and powder, consider your skin type and desired finish:
- Oily Skin: Matte finish sprays or translucent powders work best to keep shine at bay.
- Dry Skin: Dewy finish sprays add hydration without emphasizing dry patches.
- Combination Skin: You might benefit from using both—powder on oily areas and spray for an all-over set.
Experimenting with different products will help you discover what works best for you. Whether you prefer the quick-drying nature of most mists or the controlled application of powders, there’s a setting product out there to make sure your look lasts all day.
When diving into the world of makeup, it’s easy to get overwhelmed by the sheer number of products. Here are a few final tips to help you navigate your beauty journey:
- Start Simple: If you’re new to makeup, begin with the basics like foundation, mascara, and a lip product. As you become more comfortable, gradually introduce other items like blush, bronzer, and highlighter.
- Know Your Skin Type: Your skin type plays a crucial role in how makeup looks and feels. For example:
- Oily Skin: Opt for matte foundations and powder-based products.
- Dry Skin: Creamy, hydrating formulas will be your best friend.
- Combination Skin: A mix of both matte and dewy products can work well.
- Quality Tools Matter: Investing in good quality brushes and sponges can make a huge difference in application. Tools like the Beauty Blender or Real Techniques brushes are highly recommended.
- Practice Makes Perfect: Don’t be discouraged if you don’t get it right the first time. Practice different techniques and find what works best for you.
- Have Fun with It: Makeup is an art form and a means of self-expression. Experiment with colors and styles to discover what makes you feel fabulous.
Remember, makeup is all about enhancing your natural beauty while allowing you to express yourself creatively. Happy experimenting!
FAQs (Frequently Asked Questions)
What are the different types of foundation available?
Foundation comes in various forms including liquid, powder, cream, stick, and mousse. Each type serves to create an even skin tone and can be selected based on skin type and desired coverage.
How does concealer differ from foundation?
Concealer is specifically designed to cover imperfections and brighten the under-eye area, while foundation provides an overall base for the skin. Concealers come in forms like liquid, cream, and stick, with color correctors available for specific issues like redness or dark circles.
When should I use BB cream or CC cream instead of traditional foundation?
BB cream is a multitasking product that offers skincare benefits along with light coverage, making it ideal for daily wear. CC cream provides color correction properties and is suitable for those looking to address uneven skin tones more effectively.
What is the purpose of bronzer in makeup application?
Bronzer adds warmth and dimension to the face. It comes in different formulations such as powder bronzers for all-over warmth and cream bronzers for targeted contouring, helping achieve a sun-kissed glow.
What are the main types of eye makeup products?
Eye makeup products include eyeshadows (loose powder, pressed powder, cream), eyeliners (pencil, gel/cream, liquid), mascara (volumizing vs lengthening), and eyebrow products like pencils and gels. Each product plays a role in enhancing eye appearance and defining features.
How can I make my lip makeup last longer?
Using lip liners can help define borders and prevent feathering during wear. Additionally, applying a lip primer before lipstick can enhance longevity. Layering lip gloss over balm provides shine while nourishing lips without compromising on wear time.